安装 PVE
制作 U 盘启动器
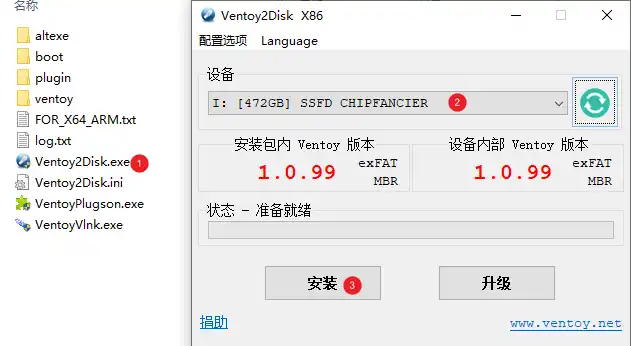
我选择的是 Ventoy,解压缩,插入 U 盘,然后点击安装即可
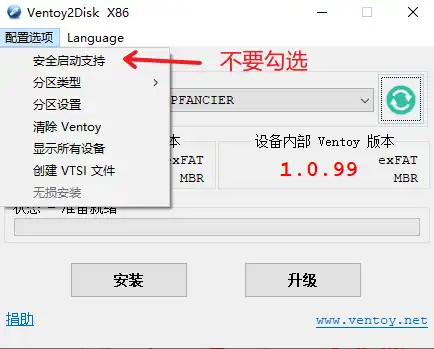
需要注意的是,不要勾选「安全启动支持」
准备 PVE ISO 镜像
下载安装 PVE 安装镜像: PVE ISO 镜像下载地址
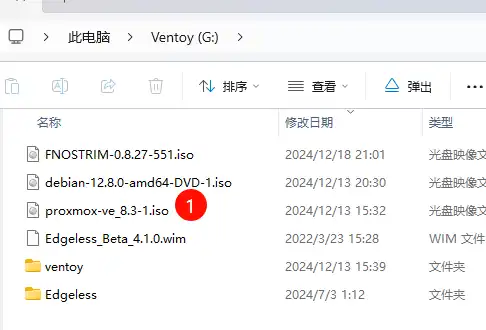
将下载好的 ISO 镜像,放入 Ventoy 刷好的 U 盘根目录即可
安装 PVE 系统
将 U 盘插入 需要安装机器的 USB 接口
启动系统,进入Bios或者快速启动,选择 U 盘启动
安装过程
按照提示一路回车即可。
PVE 系统初始化常用配置
配置国内的更新源
修改之前先备份一下:
cp /etc/apt/sources.list /etc/apt/sources.list.original
添加国内软件源
修改
vi /etc/apt/sources.list
内容为:
deb https://mirrors.ustc.edu.cn/debian/ bookworm main contrib
# deb-src https://mirrors.ustc.edu.cn/debian/ bookworm main contribe
deb https://mirrors.ustc.edu.cn/debian/ bookworm-updates main contrib
# deb-src https://mirrors.ustc.edu.cn/debian/ bookworm-updates main contrib
给 PVE 更换国内源
vi /etc/apt/sources.list.d/pve-no-subscription.list
内容为:
deb https://mirrors.tuna.tsinghua.edu.cn/proxmox/debian bookworm pve-no-subscription
屏蔽 PVE 的企业源和 ceph 的源
先注释掉pve的企业源:
vi /etc/apt/sources.list.d/pve-enterprise.list
将内容注释即可:
#deb https://enterprise.proxmox.com/debian/pve bookworm pve-enterprise
再注释掉 ceph 的源:
vi /etc/apt/sources.list.d/ceph.list
将内容注释即可:
#deb https://enterprise.proxmox.com/debian/ceph-quincy bookworm enterprise更换「LXC镜像源」
sed -i.bak 's|http://download.proxmox.com|https://mirrors.ustc.edu.cn/proxmox|g' /usr/share/perl5/PVE/APLInfo.pm

systemctl restart pvedaemon
去除「无有效订阅提示」
sed -i.bak "s/data.status === 'Active'/true/g" /usr/share/pve-manager/js/pvemanagerlib.js
sed -i.bak "s/if (res === null || res === undefined || \!res || res/if(/g" /usr/share/javascript/proxmox-widget-toolkit/proxmoxlib.js
sed -i.bak "s/.data.status.toLowerCase() !== 'active'/false/g" /usr/share/javascript/proxmox-widget-toolkit/proxmoxlib.js
systemctl restart pveproxy
删除「lvm-local」(按需,可以使可用空间最大化)
在 PVE 管理后台打开 Shell 终端,使用 lsblk 查看硬盘情况
root@pve:~# lsblk
NAME         MAJ:MIN RM   SIZE RO TYPE MOUNTPOINTS
nvme0n1      259:0    0 465.8G  0 disk
├─nvme0n1p1  259:1    0  1007K  0 part
├─nvme0n1p2  259:2    0     1G  0 part /boot/efi
└─nvme0n1p3  259:3    0 464.8G  0 part
  ├─pve-swap 252:0    0     8G  0 lvm  [SWAP]
  └─pve-root 252:1    0 456.8G  0 lvm  /
root@pve:~#
编辑 local-lvm,勾选所有内容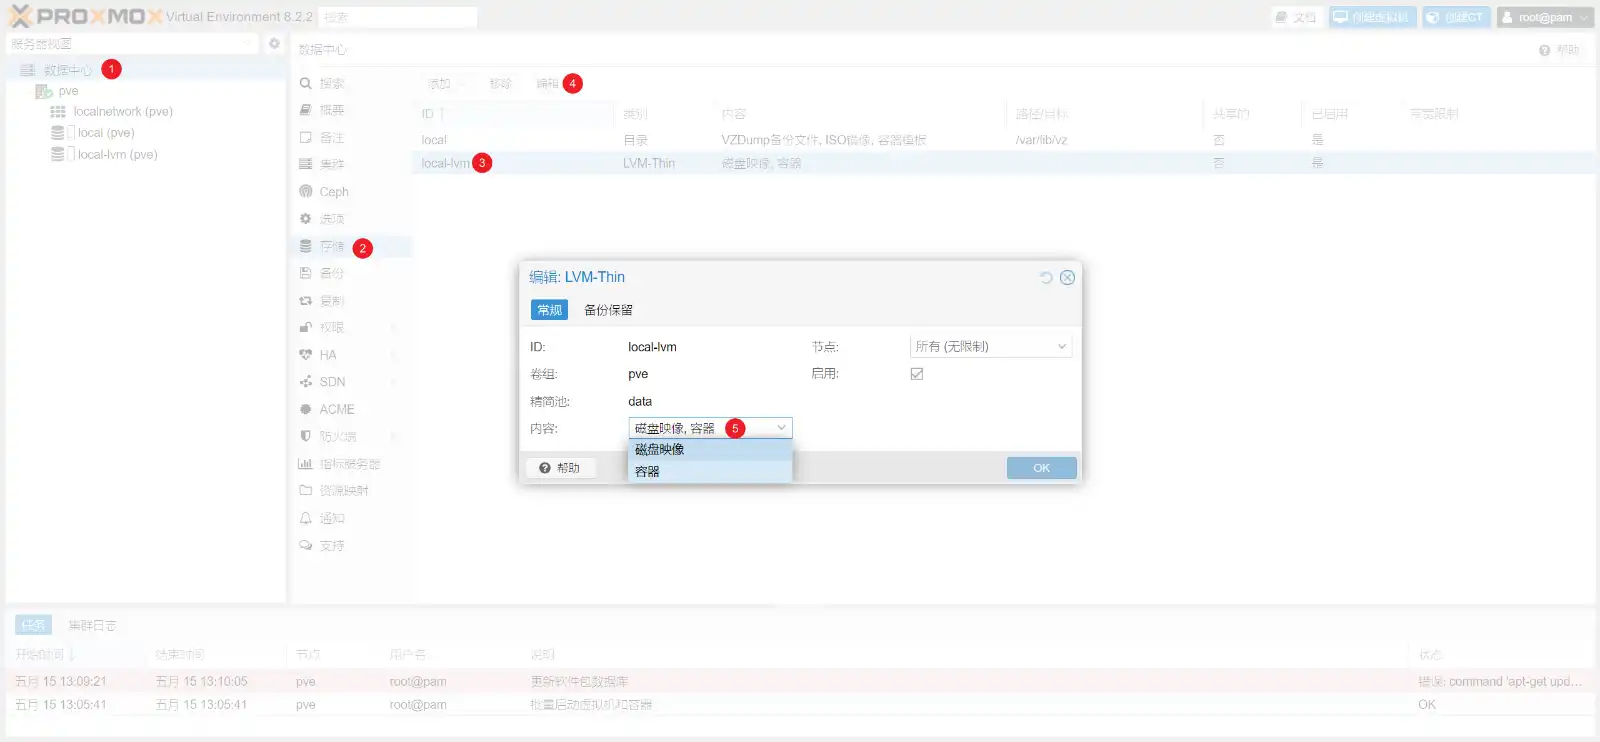
使用命令移除 pve-data
lvremove /dev/pve/data

## 会提示如下,输入 y 继续
Do you really want to remove active logical volume pve/data? [y/n]: y
  Logical volume "data" successfully removed.
使用命令扩大 root 分区
lvextend -rl +100%FREE /dev/pve/root

# 提示如下
# Size of logical volume pve/root changed from <39.56 GiB (10127 extents) to <110.24 GiB (28221 extents).
#  Logical volume pve/root successfully resized.
# resize2fs 1.47.0 (5-Feb-2023)
# Filesystem at /dev/mapper/pve-root is mounted on /; on-line resizing required
# old_desc_blocks = 5, new_desc_blocks = 14
# The filesystem on /dev/mapper/pve-root is now 28898304 (4k) blocks long.复制
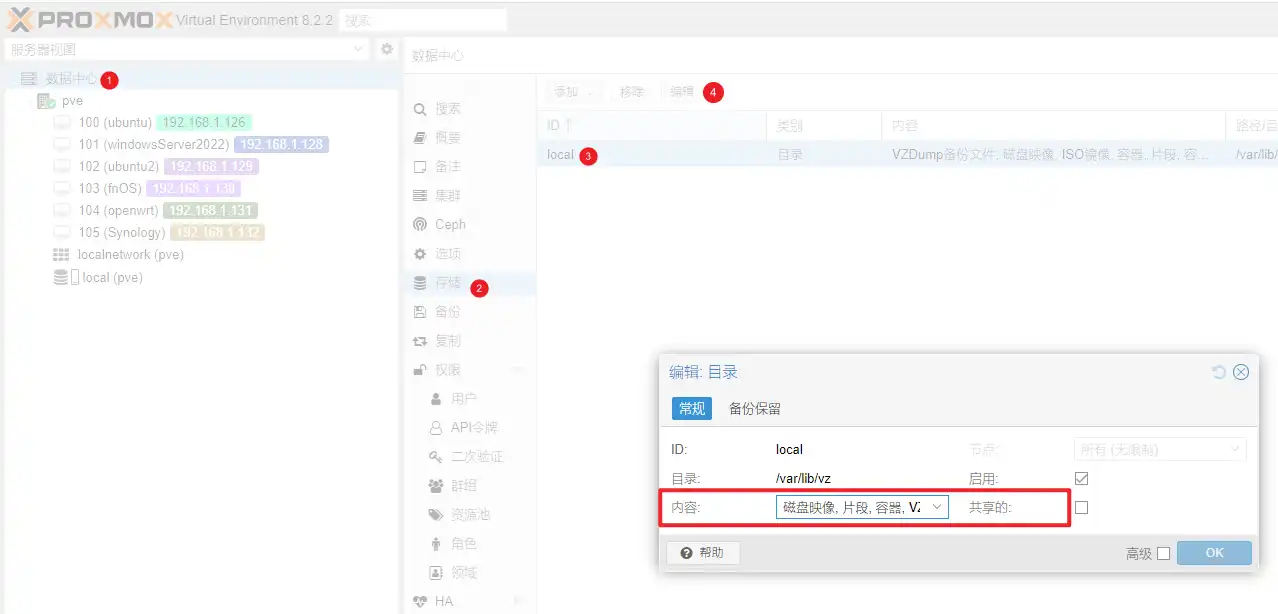
编辑 local 选择所有内容
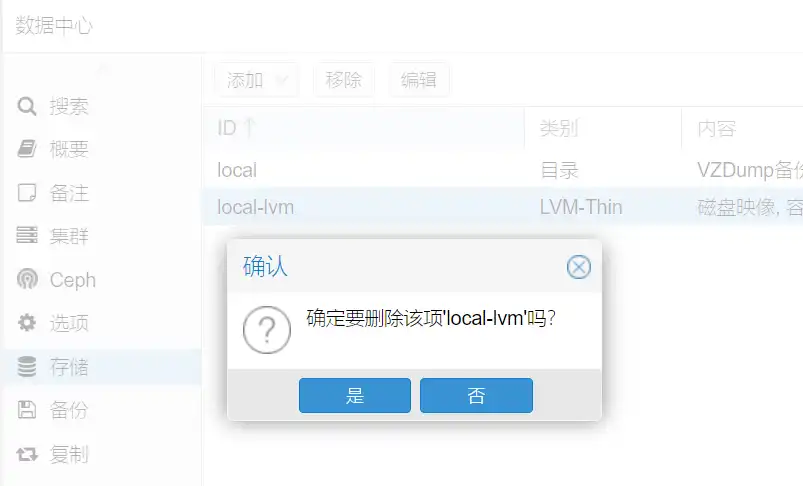
移除 lvm-thin
安装常用软件
PVE安装完成后继续安装常用的各种软件
系统类
安装 dkms 和用于 pve 的 linux-headers:
apt install -y gcc make dkms
apt install -y pve-headers-$(uname -r)
apt install --fix-broken
工具类
apt install -y unzip
网络类
apt install -y net-tools iperf iperf3
apt install network-manager
Iperf3 安装时会询问是否系统服务(自动启动),选择 yes,这样方便需要时排查网络。
PVE 一些不错的插件/脚本
PVE 查看温度脚本
(curl -Lf -o /tmp/temp.sh https://raw.githubusercontent.com/a904055262/PVE-manager-status/main/showtempcpufreq.sh || curl -Lf -o /tmp/temp.sh https://mirror.ghproxy.com/https://raw.githubusercontent.com/a904055262/PVE-manager-status/main/showtempcpufreq.sh) && chmod +x /tmp/temp.sh && /tmp/temp.sh remod
综合脚本
wget -q -O /root/pve_source.tar.gz 'https://bbs.x86pi.cn/file/topic/2023-11-28/file/01ac88d7d2b840cb88c15cb5e19d4305b2.gz' && tar zxvf /root/pve_source.tar.gz && /root/./pve_source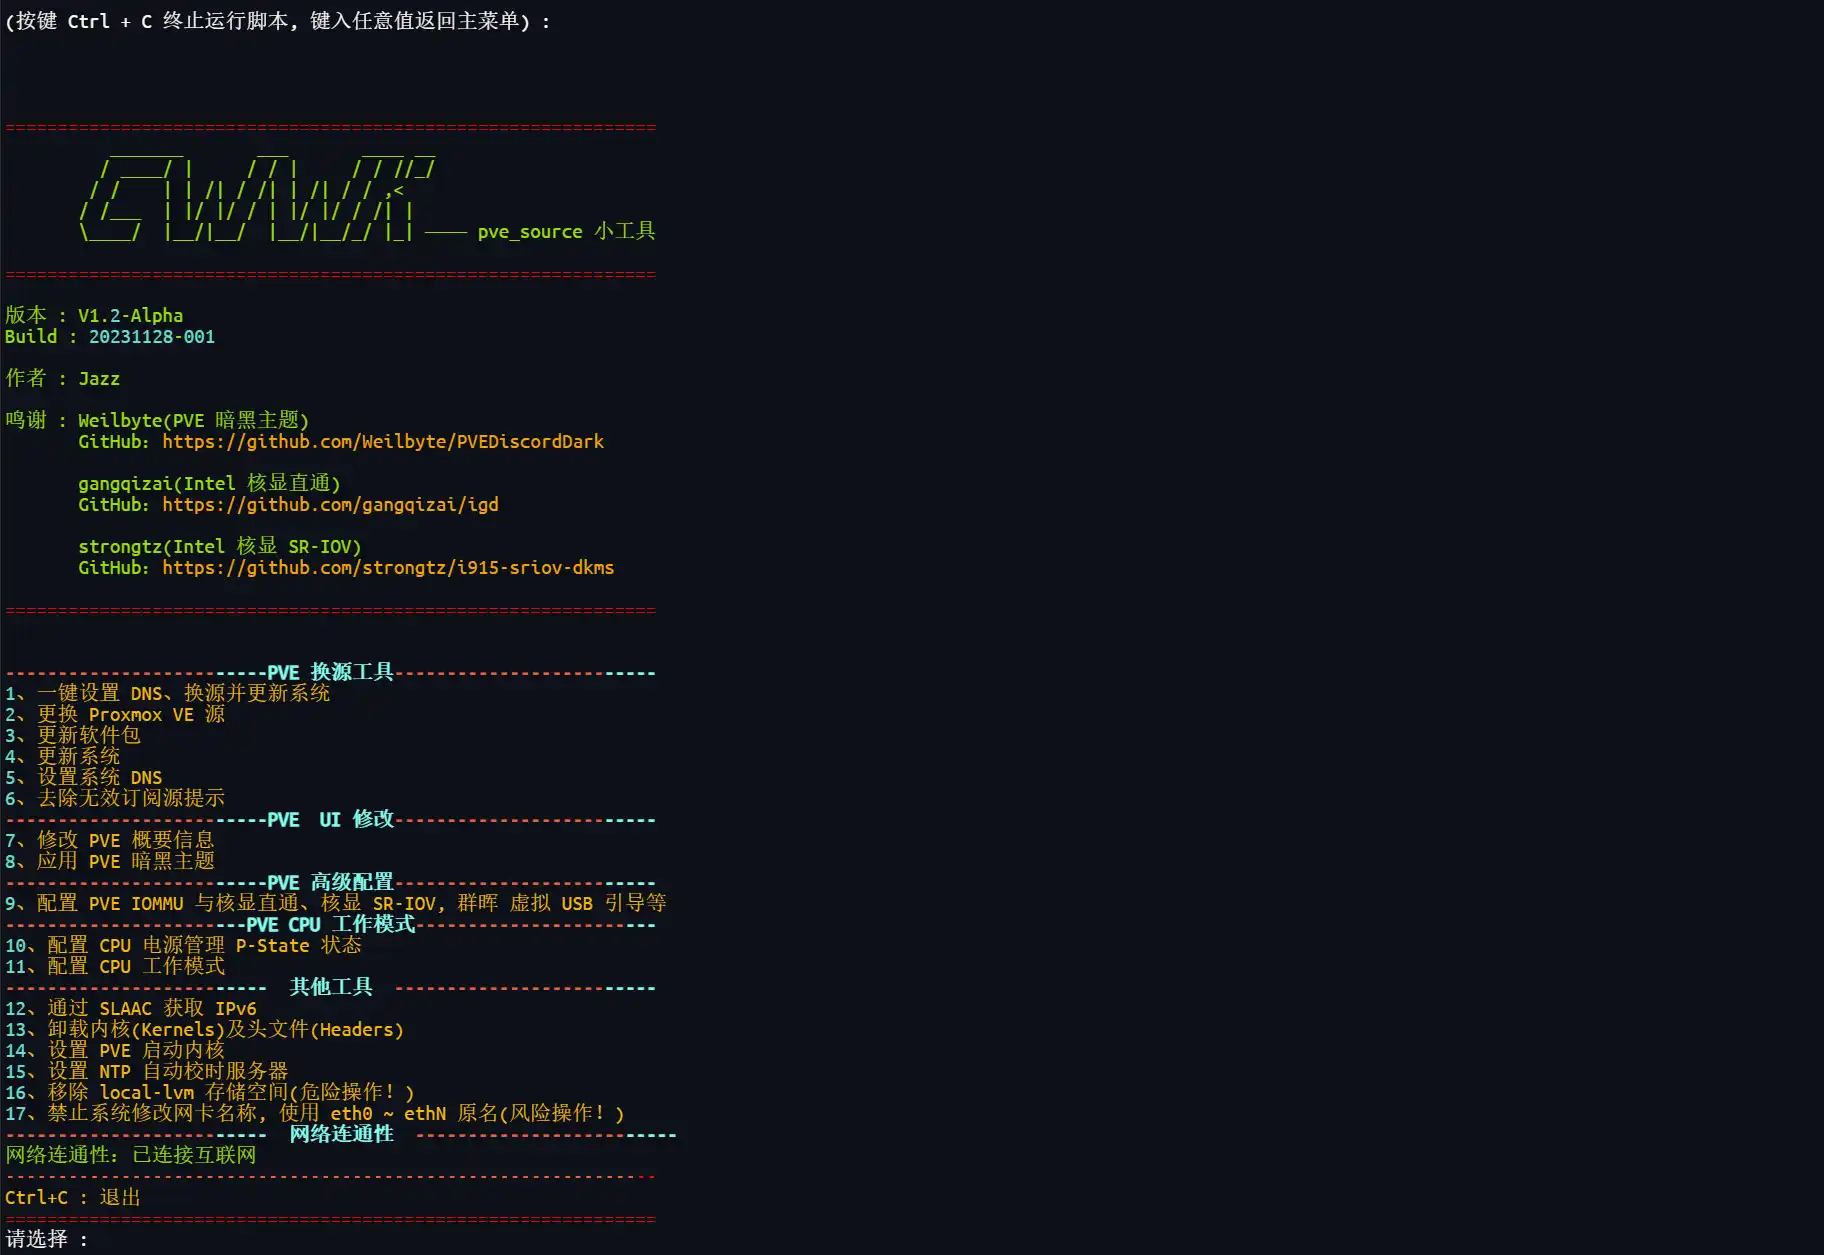
其他问题
PVE导入.qcow2镜像模板并启动虚拟机
感谢以下大佬:
Cane:
敖小剑:


.png!wp5)
